A start of a new segment looking at the different armies I get to face in Flames Of War and their strengths and weakness.
On Tuesday night I played a regular opponent at the RGMB at Flames of War. While the rest of chose to be mainstream he picked an unusual army; the minnows of the war in the East - the Finns. Now, technically my Wehrmacht army should be better, it has better weapons (Panzers, transports, artillery), superior tactics (storm trooper moves, more variation in troop choice) and overall the player/muppet using it is more experienced at FOW, having played it most weeks since the turn of the year. That said my Win/Loss/Draw ration is a pitiful 1/5/1.
How has this travesty transpired? How has the mighty German nation turned into the whipping boys of the RGMB Flames of War community? The only other nation I have a worse record against is the Italians, but having only played one game against them it is not such a good yardstick to measure against, and their turn to be analysed will come.
To start with what are the Finns strengths:
Their main strength can be summed up in two words - Fearless. Veteran. Their entire army is of a equal skill level to the Germans, and matches the Soviets fanaticism. From the point of view of their infantry this makes them very difficult to drive off because not only are they tricky to hit with defensive fire on the way in, but they rarely, if ever, fail a motivation test to counterattack. Add to this the fact that the average Finnish infantry (or Jalkavaki) platoon is 9 bases strong, certainly bigger than the infantry platoons the rest are fielding - except for the Soviets of course.
Another bonus for the Finns is that they can take a platoon of KV1’s - they may be limited to a maximum of 2 per company, but when the armour matches that of the Germans Tiger 1E’s, and it costs only 35pts more than a Tiger to get two of them they are a steal.
Mortars - everyone has them so this shouldn’t be a specific strong point, except that the mortars in the particular Finnish company I fight do not know how to miss. Ever. If a six is required, its guaranteed to be the next number rolled. Fortunately the oppositions artillery makes up for this with regular displays of ineptitude.
Moving onto weaknesses:
Limited options - each Finnish company, both the armoured and the infantry, are only able to take one support platoon per combat platoon, and this severely limit’s the size and flexibility of the force the Finnish commander can field. This, of course, should change come the release later in the year of ‘Eastern Front’, the revised version of ‘Ostfront’. It does mean at this time that the enemy cannot surprise you with their army selection, or vary it for their own entertainment.
Vehicles - two reasons, firstly the Finns have no transportation options, armoured or otherwise, so no racing up and down roads for them. Secondly the average Finnish tank is stolen from the early war Russkies, this means that apart from the formidable (but limited in numbers) KV1’s they make the Italians look almost advanced. Paper-thin armour and pop-guns are the order of the day, and few enemies have much to fear from their direct fire capabilities.
Specific reasons for my defeats:
As I lose regularly to this supposed ‘tiny’ nation I thought I’d put in a bit about what I view as the reasons for my defeats. In the last game I would simply sum it up as being because of the KV1’s. They dominated a quite open battlefield, and I just didn’t have anything that could take them on - even the StuG’s found themselves outgunned because of the enemies heavy front armour, and now I know what it feels like for the opposition when I put down my Tiger 1E!
Previously my defeats have been mostly down to the enemy infantry. It is near impossible to stop them advancing as long as they don’t make silly mistakes like doubling in front of machineguns (which, sadly, they don’t!). Then the size of their platoons has always meant my smaller ones have struggled. The evolution of my army into a panzer grenadier kompanie brought Panzer III’s which I hoped would swing the balance back my way, but the KV1’s had other ideas. Its back to the drawing board to find the formula that gave me my one win, if only I could remember what it was…..
In summery:
Despite being a fringe nation of the war on the eastern front the Finns infantry capabilities make them a force to reckoned with, especially when they are dug in and have to be levered out by your own infantry. Their failings in the armour department can be partially compensated for by the KV1’s, the rest has to be made up for by skilful tactics. They are limited in the game size they can play without having multiple companies on the battlefield, although again this may be altered by the arrival of ‘Eastern Front’.
Thursday, 29 October 2009
Sunday, 25 October 2009
40k Battle Report - 2,000pts Imperial Guard vs. Necron’s (Chris Rea)
Prologue:
It is rare at the moment that I play 40k, with Flames of War dominating my gaming schedule. However, an old friend was coming over to play a game, and with my Lord Of The Rings troops somewhere at the bottom of a packed moving-house-box I offered to bring my guardsmen out of semi-retirement.
Two problems immediately faced me; firstly, my experience with the ‘New Guard’ of the latest Imperial Guard codex was negligible and not filled with glory, secondly the opposition would be the Necrons - my most feared enemies. My record against Necron armies is very bad, with only the one battle won in approximately 6-7 attempts, and that by a squeak while the enemy was distracted at the end.
 The face of the enemy.
I turned firstly to two of my fellow generals of Guardsmen for advice, and armed with this picked my army. Tanks were the order of the day, with two demolishers, two hellhounds, two chimeras (with veterans inside) and two basilisks taking up most of my 2,000 points. An additional 67 infantrymen, primarily armed with lasguns, flamers and hope, made up the rest.
I had fought the enemy before, and fully expected a wave of scarabs to precede a line of Necron destroyers and heavy destroyers, with possibly some immortals thrown in for good measure. I was thus very surprised when two Monoliths, lots of warriors, two lots of immortals and only a few destroyers appeared! This did not bode well…..
 Metal skeletons in a graveyard, tres bizzare non?
 The monoliths arrive.
 A panoramic of the whole battlefield as the monoliths arrive.
My counter attack was quite successful. The lord fell to a hail of infantry and demolisher fire, and the immortals were completely destroyed. Sadly this came at the cost of the other basilisk, who managed the remarkable feat of blowing itself up with direct fire. Equally distressing was the way the Necron lord got straight back up and had another pop at my demolisher! The destroyers moved in on my right, and the two monoliths started to inflict some real damage upon my infantry.
I decided upon a desperate, face-saving plan. With my last act of turn 5 I raced a hellhound through two lots of Necron warriors up and into the graveyard, passing the dangerous terrain tests required. All the objectives were now contested, and should the game end now I would claim an unlikely draw. If it didn’t the warriors would tear my tank to pieces and win at least 1-0. The dice rolled and came down on a 1 - a draw had been salvaged! Not only that but the game ended with the Necron lord still down - a moral victory!

The Necron lord on its way to its third, and final, comeuppance.
My Necron kill tally of 13 is definitely (sadly) my best ever, but I really struggle to kill them, and have yet to even scratch a monolith. The monoliths are my biggest problem; minus those bits of pyramids the Necron army would lack mobility, and my ordinance weapons should do the damage. But with them the enemy is upon me and my tanks stunned or shaken in the first couple of turns. I am grateful for the lack of scarabs this time round though!
My guard army, despite the desperate efforts of other commanders to offer advice, still looks and acts like a 4th ed. Army, and lacks ranged punch or sticking power. Both will hopefully come from experience of playing with them.
It is rare at the moment that I play 40k, with Flames of War dominating my gaming schedule. However, an old friend was coming over to play a game, and with my Lord Of The Rings troops somewhere at the bottom of a packed moving-house-box I offered to bring my guardsmen out of semi-retirement.
Two problems immediately faced me; firstly, my experience with the ‘New Guard’ of the latest Imperial Guard codex was negligible and not filled with glory, secondly the opposition would be the Necrons - my most feared enemies. My record against Necron armies is very bad, with only the one battle won in approximately 6-7 attempts, and that by a squeak while the enemy was distracted at the end.
The face of the enemy.I turned firstly to two of my fellow generals of Guardsmen for advice, and armed with this picked my army. Tanks were the order of the day, with two demolishers, two hellhounds, two chimeras (with veterans inside) and two basilisks taking up most of my 2,000 points. An additional 67 infantrymen, primarily armed with lasguns, flamers and hope, made up the rest.
I had fought the enemy before, and fully expected a wave of scarabs to precede a line of Necron destroyers and heavy destroyers, with possibly some immortals thrown in for good measure. I was thus very surprised when two Monoliths, lots of warriors, two lots of immortals and only a few destroyers appeared! This did not bode well…..
The Battle:
My hopes of doing some serious damage to the enemy early on were dashed when we drew a Secure and Control mission, and a Dawn Of War setup. The enemy deployed first, and I was happy with my side because I felt I had two of the three objectives in easy striking distance (the hill and the farm, with the third objectives being in the graveyard). The Necron warriors deployed in the graveyard on my left, the destroyers and a unit of immortals on my right. My own deployment saw one squad in the trees to my left, and the HQ and a lascannon squad in the trees to the right.
My hopes of doing some serious damage to the enemy early on were dashed when we drew a Secure and Control mission, and a Dawn Of War setup. The enemy deployed first, and I was happy with my side because I felt I had two of the three objectives in easy striking distance (the hill and the farm, with the third objectives being in the graveyard). The Necron warriors deployed in the graveyard on my left, the destroyers and a unit of immortals on my right. My own deployment saw one squad in the trees to my left, and the HQ and a lascannon squad in the trees to the right.
Metal skeletons in a graveyard, tres bizzare non?
My opening bombardments managed to knock down one destroyer, who was swiftly avenged by his friends; killing all of my lascannon squad. This was almost the high point of my offensive as the monoliths then dropped into my lines and disgorged a unit of immortals and a Necron lord. Thankfully the particle whip thingy did little damage to my units, although the immortals destroyed a basilisk. The lord charged the demolisher in the centre, only to find it had moved at cruising speed and missed it completely!
The monoliths arrive.A panoramic of the whole battlefield as the monoliths arrive.My counter attack was quite successful. The lord fell to a hail of infantry and demolisher fire, and the immortals were completely destroyed. Sadly this came at the cost of the other basilisk, who managed the remarkable feat of blowing itself up with direct fire. Equally distressing was the way the Necron lord got straight back up and had another pop at my demolisher! The destroyers moved in on my right, and the two monoliths started to inflict some real damage upon my infantry.
On my left I had sent the two hellhounds to make a nuisance of themselves against the Warriors in the graveyard, however stone walls and steel Necrons clearly don’t burn easily and only one casualty was caused.
The central demolisher survived the lords advances (ooer) and joined in with the two, newly arrived, chimeras to put him back on his backside again. The hellhounds continued to bombard the warriors with no effect, and the right-hand demolisher failed to make an impression on the monolith there, which had, by now, decimated my infantry in the farm.
The Necron lord failed his I’ll-be-back roll, then failed his I’ll-be-back-using-a-monolith roll, then passed using his second I’ll-be-back-using-a-monolith attempt and went off to attack a chimera, rather successfully as it turned out. The survivors jumped out and used a meltagun to kill him for the third time. Meanwhile the monoliths had parked themselves upon both the hill and the farm, and lacking the firepower to remove them (both demolishers had by this time lost their cannons and their will to resist) I would be unable to claim an objective.
I decided upon a desperate, face-saving plan. With my last act of turn 5 I raced a hellhound through two lots of Necron warriors up and into the graveyard, passing the dangerous terrain tests required. All the objectives were now contested, and should the game end now I would claim an unlikely draw. If it didn’t the warriors would tear my tank to pieces and win at least 1-0. The dice rolled and came down on a 1 - a draw had been salvaged! Not only that but the game ended with the Necron lord still down - a moral victory!
The Necron lord on its way to its third, and final, comeuppance.
Analysis:
Simply put: I hate Necrons, and I’m struggling to get used to the new guard.
Simply put: I hate Necrons, and I’m struggling to get used to the new guard.
My Necron kill tally of 13 is definitely (sadly) my best ever, but I really struggle to kill them, and have yet to even scratch a monolith. The monoliths are my biggest problem; minus those bits of pyramids the Necron army would lack mobility, and my ordinance weapons should do the damage. But with them the enemy is upon me and my tanks stunned or shaken in the first couple of turns. I am grateful for the lack of scarabs this time round though!
My guard army, despite the desperate efforts of other commanders to offer advice, still looks and acts like a 4th ed. Army, and lacks ranged punch or sticking power. Both will hopefully come from experience of playing with them.
Saturday, 24 October 2009
FOW Battle Report - 2,500pts German Panzergrenadier Kompanie Vs. British 8th Army Motor Company (Red) in a Fighting Withdrawal
The Armies:
The British were easy for me to predict because my regular opponent would be using his whole army. I knew to expect, amongst other things; a flight of hurricanes, five platoons of Crusader II’s (15 tanks in total), a number of 6pdr portees, and finally my nemisis the Universal Carrier recon platoon.
My own force would be very different from usual because for the first time it would be picked solely as a panzer grenadier kompanie. I was limited in the number of support choices I could take due to only being able to field two combat platoons, but I managed to fit in the 88’s (for AA support and fear factor mostly), two platoons of Panzer III’s (M & N variants, 6 tanks in all), the compulsory three StuG F/8’s, a mortar platoon and a machinegun platoon. Of my combat platoons one was armoured, and a small motorised pioneer platoon completed the listings.
The Battlefield and The Plan:
Playing on a 8ft by 6ft battlefield, the scenery was similar to my previous encounter with the 8th Army and the Black Cats (see below). A small town and road dominated the (German) right, with the centre and left much more open and populated by a farm on the left, and cornfields, trees and a few hills in the left/centre.
Having decided the mission (Fighting Withdrawal), and managed to secure the job of attacking I decided a bold and aggressive policy was the way to go after the embarissment of last time out. Having watched the enemy spread themselves across the battlefield I grouped my entire company into the far left-hand third, tanks to the front to create an attacking wedge which the panzer grenadiers would follow in. The 88’s would proved cover from the inevitable RAF, and the mortars and machine guns would keep the enemies heads down. I also deliberately set-up opposite the enemies recon platoon, hoping to decimate it early on.
The Early Stages of the Battle:
My Germans, automatically getting first turn, poured forwards at speed towards the thin British line. Unfortunately the recon platoon saw the impending doom and scooted away behind the farm with only the one casualty. My initial firing also accounted for a Crusader II, but it didn’t matter as much as the fact that surprise had been achieved.

The hated and feared British recon troops finally forced to retreat past the objective marker.
The British were easy for me to predict because my regular opponent would be using his whole army. I knew to expect, amongst other things; a flight of hurricanes, five platoons of Crusader II’s (15 tanks in total), a number of 6pdr portees, and finally my nemisis the Universal Carrier recon platoon.
My own force would be very different from usual because for the first time it would be picked solely as a panzer grenadier kompanie. I was limited in the number of support choices I could take due to only being able to field two combat platoons, but I managed to fit in the 88’s (for AA support and fear factor mostly), two platoons of Panzer III’s (M & N variants, 6 tanks in all), the compulsory three StuG F/8’s, a mortar platoon and a machinegun platoon. Of my combat platoons one was armoured, and a small motorised pioneer platoon completed the listings.
The Battlefield and The Plan:
Playing on a 8ft by 6ft battlefield, the scenery was similar to my previous encounter with the 8th Army and the Black Cats (see below). A small town and road dominated the (German) right, with the centre and left much more open and populated by a farm on the left, and cornfields, trees and a few hills in the left/centre.
Having decided the mission (Fighting Withdrawal), and managed to secure the job of attacking I decided a bold and aggressive policy was the way to go after the embarissment of last time out. Having watched the enemy spread themselves across the battlefield I grouped my entire company into the far left-hand third, tanks to the front to create an attacking wedge which the panzer grenadiers would follow in. The 88’s would proved cover from the inevitable RAF, and the mortars and machine guns would keep the enemies heads down. I also deliberately set-up opposite the enemies recon platoon, hoping to decimate it early on.
The Early Stages of the Battle:
My Germans, automatically getting first turn, poured forwards at speed towards the thin British line. Unfortunately the recon platoon saw the impending doom and scooted away behind the farm with only the one casualty. My initial firing also accounted for a Crusader II, but it didn’t matter as much as the fact that surprise had been achieved.
 The British Portees lie in wait for the Panzer III's.
The British response was immediate, with Crusaders racing from all corners of the battlefield to try and get in the way of the panzers. Their big hope, however, was from their two units of 6pdr portees, one of which was already in situ, and the second appeared from ambush beside it to the left of the farm. However, the distance was against them, and their opening volley could only scratch the German tanks paintwork!
Continuing the attack:
The Germans continued their headlong charge, with the Panzer III’s and panzer grenadiers going to the left of the farm, and the StuG’s moving more towards the right. The machine guns and mortars made it their mission to pin the British infantry defenders of the farm. The Panzer III’s machine guns made light work of the portees, just in time for the first wave of Crusaders to drive straight into their lines! A close-range tank battle ensued, the British having learn the hard way that they couldn’t damage the German tanks from the front. A Panzer III was lost to these tactics, but the devastating replies accounted for at least six Crusaders and tested the limits of the smoke-marker supply. The Brits Universal Carriers meanwhile had retreated further under fire from the StuG’s.

A panoramic of t he battlefield approximatley turn 4.
In other small cameo’s across the battlefield more truck mounted infantry ran into German mortar fire and disintegrated, while the 88’s survived being smoke bombed long enough to down a hurricane, and drive off a HMG universal carrier platoon. The truck-mounted panzer grenadiers launched an assault upon the farm itself, clearing it of enemy troops at the cost of their own platoon, and the German company commander (who had a sudden attack of cowardice most unbecoming a German officer!).

Burning Crusaders.
The Final Acts:
With turn 6 approaching, and armoured superiority nearly achieved, the StuG’s were sent racing to secure the objective on the far right, while the Panzer III’s wore down the final Crusader platoon. Neither were able to reach their respective objectives when the Brit commander decided enough was enough and it was time for a serious tea break (the Brits had lost four platoons, and been forced to withdraw three earlier). He failed his company moral check and it was a German victory - just as the German CO fled from the battlefield!
 The final German charge.
Analysis:
For once my tactics worked a treat. The major sticking point had been the portees, but these were unable to do any damage this time - the opposition was possibly unfortunate to find a number had deployed just out of range, and the rest were plain unlucky to see so many shots bounce off - and machine guns took care of them. Piling my troops on the left meant a large number of British units were out of position and unable to take part before they had to be withdrawn due to the scenario rules, it also gave me a local superiority, and in the event the StuG’s and armoured panzer grenadiers were more observers than participants.
One particularly interested fact that came out of the battle was that the Crusader II’s 2pdrs were unable to even bail out the Panzer III’s at long range, and needed to get amongst them to do any damage. This could have turned out nasty if a larger number could have charged in at once, but because they were stretched out across the British lines they arrived in dribs and drabs and the German tanks were able to take them on at a good range.
Footnote - The Germans rapid advance meant only the mortars and the 88’s were viable targets for the RAF, who once again failed to cause any damage, and lost a plane in trying to. Sadly the victory did not include the Black Cats, and another battle will have to be fought.
The hated and feared British recon troops finally forced to retreat past the objective marker.
Saturday, 17 October 2009
FOW Battle Report: 4,000pt Free-For-All vs. The Brits
The points value was 4,000 a side, with the British (Aidan's) 'Black Cats' and Red's 'Desert Rats' proving the opposition for my German Grenadierkompanie and Panzergrenadier Kompanie combination in a Free-For-All battle. The report is lifted straight from Red's views on the RGMB forums, while I claim responsibility for the poor photography.
Quote from the Commander of the British Motor Company - Eighth Army:
"I set off for the border not knowing if I would have Black Cat allies or a combined German-Italian force to deal with, but having all my mid-war Desert Rats packed for the trip made choices a little simpler. Whilst I was awaiting my opponent(s) / ally I was invited in where I noticed the sprue of spare guns from panzer turrets... A few discreet questions to a local resident confirmed that Herr Rick had recieved a number of new panzers, things had become intresting..."
"The transport then arrived bearing my opponent and it now turned out my allies as well. Rick went to eat I unpacked my army and Aidan leafed through some old magazines... "

The Black Cats Valentines waiting for their CO.
"Once these formalities were completed we rolled Free For All and deployed on the table. The left of the battlefield (from the British perspective) was dominated by a built up area with a road running through, there were hills at our end and woodland in German Territory. The rest of the battlefield was largely open with a number of wheat fields and some scatted woodland. Objectives were placed either end of the road, near a small group of buildings on the right of the British lines and at the edge of a wheat field in the German area. "
"Once these formalities were completed we rolled Free For All and deployed on the table. The left of the battlefield (from the British perspective) was dominated by a built up area with a road running through, there were hills at our end and woodland in German Territory. The rest of the battlefield was largely open with a number of wheat fields and some scatted woodland. Objectives were placed either end of the road, near a small group of buildings on the right of the British lines and at the edge of a wheat field in the German area. "
"Jerry had an artillery battery at the back, Machineguns and Marders on our right '88s and panzers in the centre and a veritable armoured horde on our left. The Motor platoons formed a line with Black Cats occupying the defensive position overlooking our right objective and massed machineguns holding the left. 6pdr portees deployed to catch the panzers in the centre, Bren Carriers massed behind the built up area and Crusaders deployed on both flanks. There were 2 platoons of infantry tanks with the bren carriers and a platoon of 6pdrs amongst the hills at the end of the road."


Deployment viewed from the British left flank.


Deployment viewed from the British right flank.

German Grenadiers and Panzer III's rready for the off.

German Grenadiers and Panzer III's rready for the off.

The Desert Rats portees mass behind the Black Cats infantry.
"The Germans made a recce move with some BMWs behind a wood, parked up and decided to have a snooze.The Brens moved into town and found a cafe open. The Panzer Grenadiers then moved up with the StuGs and Tigger whilst the panzers in the centre moved aimlessly forward. Black Cat command went into crisis mode as they felt incapable of dealing with the massed german armour threatening to roll through their positions. The Brens on the other hand figured that they could tackle a couple of infantry platoons, even if they were in the ruins on the other side of town and set off down the road to prove the point. Black Cat morale seemed to evaporate entirely as they seem to have got the impression that the Desert Rats were abandoning them to their fate rather than giving Jerry the damn good thrashing he deserved."

The British advance into the town, the German armour advances into difficult terrain and trouble!

The German recon troops having a relaxing evening.
"On the right a long range firefight between armoured units developed which favoured the Germans and depleted the supply of smoke markers. However the Portees made an impression on the panzers forcing them into a withdrawal and leaving the motorised infantry free to advance. The Mortars proved badly positioned to target the '88s and simply annoyed the Marders. "

The 8th Armies portees and truck-mounted infantry deploy in the centre using Wellington's patented 'reverse slope' tactic.

The Marder II's and 88mm guns inflicting damage upon the British right and its Crusader tanks.
"The German advance on the left rapidly reversed direction to save their objective as the Grenadier platoons in the ruins were overrun leaving a large gap in their line in front of the objective. An increasingly desperate melee then broke out as the halftracks were outflanked by Crusaders, The Brens punched right through to the objective forcing surviving panzers to throw themselves infront of the Portees fending off the inevitable. StuGs tried to run round the woodland whilst Tigger bogged down in it. "

The Universal Carriers and Matilda's swarm the objective, driving off the remains of the German Grenadiers.

A last ditch attempt by the Panzer III's prevents defeat on the right long enough to claim a draw - they were destroyed minutes later by portees.
"The German mortars were mowed down by fire from the infantry tanks as the British advance slammed into Jerry's rear area and the Marders were knocked out by the last Crusaders on the right letting the infatry get within striking distance of the other objective. The MG42s embarrassed themselves being unable to bump off a single team. Though this was nothing to the embarrassment of the RAF who failed to kill anything during the entire battle, for the loss of 2 hurricanes.At this point the Germans heard their Fraulines calling and claimed a draw. "

The final British infantry advance on the right falls just short of the objective after the last Crusaders were cut down by the 88mm guns, although not before they had destroyed the Marder II's.

Black Cat infantry in reserve.
My own Final Anaylsis: In hind-sight my army selection was rushed because I wanted to field my expensive (in points and cash) latest aquistions; which subsequently had little or not effect, while my tactics were extremely poor and made little use of my own abilities while the brawl that developed on the British left playing perfectly to theirs.
The initial (and unexpected) panic from the Brit left flank in response to my armour's deployment would have been almost comical if I hadn't realised almost immediately that my tactics were total bollocks! Having set up with the Tiger, StuG's and panzer grenadiers on the right I realised that I had make a monumental error in dooming my main (only!) assault force to a close-range fire-fight amongst the close terrain of trees and buildings on my right. This was trying to play the Brits at their own game, when my own strengths were the reach and firepower of my own weapons.
The number of enemy tanks, AT guns and infantry in that area mean that my assault force would have been fortunate indeed to clear the edge of the buildings with less that 50%+ casualties, and then they would have to fight more AT guns, tanks and infantry on the far side! (Truly die Englanders were many!) Faced with the problem of being unable to successfully attack I was then left out of position when the Universal Carriers went on their rampage through the buildings and towards the objectives. My efforts at falling back to try and cover the threatened objective then revealed my flanks and my panzer grenadiers who were easy prey to the opportunistic Black Cats.
In all honesty I believe that once my deployment was complete I had ruined my own chances of victory, and only frantic stalling (by moving troops to block the enemy, not the taking-an-age-to-move-a-single-figure type of stalling) and a time-limit to the battle saved me from what would have been a deserved defeat. I will conceed that a number of excellent tactic ploys by the Brits made life even harder, including the deployment of the 6pdrs across the battlefield, the Universal Carriers charge, and the Valentines advance through the woods - the latter preventing me from disengaging without loss.
The only part I was happy with was my left (the British right) where the Marders and 88's held their own against the Crusader horde. And even at the end my machine gun platoons were in a good position to fend off the follow-up wave of truck-mounted infantry. The 88's get the German 'Gun-of-the-battle' award, claiming I think about 6 Crusaders and 2 huricanes (and possibly a Matilda but I can't remember) between them.
A re-evaluation of both army and tactics is called for, then I'd like a rematch please, if the enemy is not too busy drinking tea and getting bailed out by the 'Amis'.....
Thursday, 8 October 2009
The Clash Of Might - A Warhammer Battle
Somewhere in the mists of time a group of gamers convened and conspired to fight a Warhammer battle the like of which has not been seen at their local club in over three years. This is their tale…….
Participants:

"The Emperor Karl Franz"

"The Git on his dragon"
Completing the alliance currently know as ‘Evil‘:
"Brian Von Carstein"

"Grom the Paunch (after his latest diet)"

"An Estate Agent - aka Daemon Horror from the magical realms"
The Rules:
The current set of Warhammer Fantasy rules were used (7th ed.), with just a few clarifications to ensure each side operated as an army rather than several different entities, and these follow; There was one general on each side (the Emperor Karl Franz for the armies of good, and the representative of the Von Carstein family for the forces of evil). Each side generated two dice for castings/dispelling magic.
The lack of a traditional Goblin horde (all too busy sowing or something similar) brought some of the more stereotypically evil participants to the fore, with my Von Carstein Vampire Count leading a motley crew of Ratmen, Goblins, Chaos warriors and shuffling dead things against their foe (note: the Vampire was the army general only due to the need to keep the undead marching, the Chaos Daemon Prince or Grom the Paunch would probably have been a better choice!).
The rough plan was to advance swiftly with the left flank and try to break through whatever faced them before rolling up the enemy left to right using our quick shock troops, while the infantry centre pinned them in their deployment zone so they couldn‘t react. The Chaos forces were to crush the forces facing them in the village and prevent re-enforcements being sent to help anywhere else.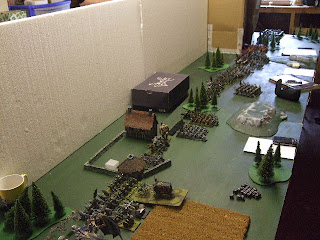
"Freakish roll on the scenery table...."
The Enemy and their deployment:
Our prediction that the Elves would be facing out left flank, and the Empire our right was correct, with the elf cavalry looking to try the same trick as us, and the Empire centre bulging with infantry, heavy cavalry and guns! My initial worries that the battlefield would be too big were banished, it now looked too small with all the models on it! Having managed to win the roll to pick a side, we now won the roll to go first.

"The Foe"

"The whole damn show"
Early Days:
The bloodiest encounter at the start was on our left where the elves cavalry charged straight into the wolf riders and the fell bats, both of which evaporated swiftly! However, a counterattack by Grom and the Black Coach saw them off swiftly. We did run into a problem with the fields of corn, which, following an in-depth read of the rules turned out to be difficult terrain, and would cramp our attempts at breaking through in the early turns.


"Empire troops holding the village"

The undead impacted into the Empire centre, and after two turn of bitter fighting had managed to push them back over the central hill and make inroads towards their rear. However on the way through they had lost both their cavalry (destroyed by the White Wolves), and their skaven and goblin flank protectors; the goblins, sensing blood, had gone after the remains of the elves, while the skaven plague monks were tied up trying to deal with the rampaging white wolves.

End Days:
At this point, with VP’s and the whole game having been very even so far, it all fell apart for the Evil alliance. The good news in turns 5 and 6 was that the remains of the elves on the left were being gradually ground away towards extinction by the skaven, Grom and the Goblins. The bad news was there was a disaster about to happen in the centre to the undead, and on the right to the Chaos.
The undead wedge that had driven into the centre of the empire lines had been hit in its unprotected flank by empire reserves lead by the (so far mainly anonymous) Emperor Karl Franz on his griffon. Already stuck in combat with the near invincible pikemen, the undead were overcommitted on the ‘needing to raise reserves’ front, and began to swiftly fade away.
To their the right the plague monks had finally managed to drive off the knights of the white wolf, only to discover themselves alone due to a general Chaos withdrawal in the direction of ye olde city of Manchester (the, now banished, Daemon Prince had muttered something about prior commitments in the daemonic haunting department during the build-up, but the rest of the forces of evil had hoped to have moved onto the celebratory squig beer and blood banks before such an eventuality arose).
As the Goblins continued to work their way through the (astonishingly inept) sword masters of hoeth and spearmen on the evil left, the undead finally collapsed (literally) in the centre, with the evil general meeting the Emperor in single combat (“its just you, me, my hammer of sigmar………oh, and my 40 guards!”). The vampire fell to the hammer just before the combat resolution finished him off.

The final part was played out by a 475pt Chaos Warrior unit which was been in the Goblin reserve all game, and now charged into the Emperor looking for death and glory. They discovered the Emperor still had many, many friends, and that their own weapons were made of foam just before they got the death part of their wish.

On this suitable note the battle ended on turn 6 just before the time limit of 6pm, with few evil troops (or elves!) left on the battlefield, and Good winning by 58 VP‘s to evils 27.
Aftermath:
Up to turn 4 the victory points were tied, and it suddenly went all wrong for the baddies! The elves had collapsed in a truly spectacular way in the first few turns, and only became more resilient once they were reduced to approximately 20 models. The Empire, however, stood its ground and magnificently dealt with everything that came its was, including the 2,500pts of Chaos Warrior army, and the nearly 2,500pts of Undead and skaven that tried to chew its way through the centre.
In hindsight my own problems came when my undead attack became disjoined due to charging the pikemen early with zombies and grave guard, and, more importantly, losing my right-sided skaven and chaos flank support which gave the much-vaunted empire ‘second line’ its opportunity to hit all of my shuffling units in the flank.
In game terms it was an excellent day and it was very enjoyable playing Warhammer on such a large battlefield. The fog of war rules at the start provided some surprises, and shortened the setting up time, while the 30 minutes rule kept the momentum going and we fitted in 6 turns between 11am and 6pm.
Participants:
On the side of sugar, spice and all things nice:
Empire - Aidan “Emperor Karl Franz” (6,000pts)
High Elves - Red “Some Pointy-Eared on a dragon“ (3,500pts)
Empire - Aidan “Emperor Karl Franz” (6,000pts)
High Elves - Red “Some Pointy-Eared on a dragon“ (3,500pts)

"The Emperor Karl Franz"

"The Git on his dragon"
Completing the alliance currently know as ‘Evil‘:
Goblins - Chris Fry “Grom the Paunch” (2,500)
Chaos - Chris Fazey “Dastardly entity from the warp” (2,500pts)
Undead & Skaven - Rick/Me “Brian Von Carstein“ (5,000pts)
Chaos - Chris Fazey “Dastardly entity from the warp” (2,500pts)
Undead & Skaven - Rick/Me “Brian Von Carstein“ (5,000pts)

"Brian Von Carstein"

"Grom the Paunch (after his latest diet)"

"An Estate Agent - aka Daemon Horror from the magical realms"
The Rules:
The current set of Warhammer Fantasy rules were used (7th ed.), with just a few clarifications to ensure each side operated as an army rather than several different entities, and these follow; There was one general on each side (the Emperor Karl Franz for the armies of good, and the representative of the Von Carstein family for the forces of evil). Each side generated two dice for castings/dispelling magic.
The result of the battle was decided using the old rules of one victory point per 100pts, or part of 100pts, destroyed (e.g. a Chaos unit worth 455pts was worth 5 VP when destroyed). We began play around 11am, using a time limit of 30 minutes per sides turn (any actions not completed by then were lost or drawn in the case of combats), and had a finishing time of 6pm. The battlefield was 12ft by 6ft in size, with each side allowed to deploy up to 24” on from their side. Finally on the day sheets of polystyrene and cardboard were used to create a ‘fog of war‘ effect so that both sides set up at the same time without know how the other was deploying.
The (Evil) Plan:
Being on the side of Evil I can only comment on the dastardly plans we hatched, maybe the forces of good will even the balance at some point.
The (Evil) Plan:
Being on the side of Evil I can only comment on the dastardly plans we hatched, maybe the forces of good will even the balance at some point.
The lack of a traditional Goblin horde (all too busy sowing or something similar) brought some of the more stereotypically evil participants to the fore, with my Von Carstein Vampire Count leading a motley crew of Ratmen, Goblins, Chaos warriors and shuffling dead things against their foe (note: the Vampire was the army general only due to the need to keep the undead marching, the Chaos Daemon Prince or Grom the Paunch would probably have been a better choice!).
With the battlefield obscured by a primitive version of the fog of war the decision was made to put the undead infantry alongside the goblins in the centre, with the ratties guarding their flanks on both sides. The extreme left flank was viewed the most open and the swifter units placed there (the undead dragon, Black Coach and fell bats deploying alongside Grom the Paunch’s chariots and his wolf-riders). The right flank was an almost entirely Chaos affair with the disciples of Slaanesh facing the hills and village.
The rough plan was to advance swiftly with the left flank and try to break through whatever faced them before rolling up the enemy left to right using our quick shock troops, while the infantry centre pinned them in their deployment zone so they couldn‘t react. The Chaos forces were to crush the forces facing them in the village and prevent re-enforcements being sent to help anywhere else.

"Freakish roll on the scenery table...."
The Enemy and their deployment:
Our prediction that the Elves would be facing out left flank, and the Empire our right was correct, with the elf cavalry looking to try the same trick as us, and the Empire centre bulging with infantry, heavy cavalry and guns! My initial worries that the battlefield would be too big were banished, it now looked too small with all the models on it! Having managed to win the roll to pick a side, we now won the roll to go first.

"The Foe"

"The whole damn show"
Early Days:
The bloodiest encounter at the start was on our left where the elves cavalry charged straight into the wolf riders and the fell bats, both of which evaporated swiftly! However, a counterattack by Grom and the Black Coach saw them off swiftly. We did run into a problem with the fields of corn, which, following an in-depth read of the rules turned out to be difficult terrain, and would cramp our attempts at breaking through in the early turns.

"Undead and Chaos advance"

"Elven wall of spearmen"

"Initial clashes on the (Evil) left"
On our right the Chaos charged towards the edge of the village, whereupon most of their targets turned tail! Throughout the battle very few troops would run from the board due to the depth of the deployment zones. Most would rally and return - except for our wolf riders who fled on turn one never to be seen again - the gits! The Empire general moved up his steam tank and heavy cavalry ready for the test the numerous Chaos warriors and monstrous creatures would present.

"forces of evil moving up in the centre and right"
In the centre the Goblins and undead advanced, with the compulsory fanatics immediately lured out by pistoliers, although the horsemen regretted their generals decision! Magic was mainly ineffective, and proved so throughout due to the number of dispell dice, the size of the armies, and an abnormal number of miscasts, mostly by the high elves. Some success was had by the Chaos in casting scary spells, but the location of Karl Franz on the Empire left meant that sturdy leadership was had by all and nobody ran.
High Elf collapse:
The loss of their cavalry turned out to be the beginning of a catastrophe for the elves on turns 2-4. The Vampire on his zombie dragon had flown in to challenge the elf noble on his white dragon, and subsequently killed him. Then, while chasing the dragon down, it also managed to panic large sections of the elf army, with spearmen, archers and swordsmen fleeing, leaving them open to the attacks of Grom, his Goblins, the giant (who recovered from his fear of elf archery just long enough to come out from behind his building and be pin cushioned anyway), and the skaven clanrats. With the elves falling like ninepins the Empire general declared his allies army to be lost, and moved up troops to cover his right flank.

"The elves before it all went wrong"

"The elves afterwards..."
Middle Days:
The initial Chaos attack on the right had been slowed by the firepower of the Empire troops, and now suffered from a number of carefully planned counterattacks using heavy cavalry. The loss of the Daemon Prince leader, and his pet Shaggoth (the latter to a hell blaster), was keenly felt, and the Chaos warrior units were not in a position to avenge them due to the scenery and slow movement conspiring against them.
The initial Chaos attack on the right had been slowed by the firepower of the Empire troops, and now suffered from a number of carefully planned counterattacks using heavy cavalry. The loss of the Daemon Prince leader, and his pet Shaggoth (the latter to a hell blaster), was keenly felt, and the Chaos warrior units were not in a position to avenge them due to the scenery and slow movement conspiring against them.

"Empire troops holding the village"

"The Empire counter attacks being prepared"
In the midst of the disaster which was the elf army a ray of light gleamed on turn 3 as the Vampire Lord on his dragon was ironically killed by a giant stake from a bolt thrower, and the dragon collapsed into dust before the elf archers, defeated by a rank bonus and the enemies numerous nature.
In the midst of the disaster which was the elf army a ray of light gleamed on turn 3 as the Vampire Lord on his dragon was ironically killed by a giant stake from a bolt thrower, and the dragon collapsed into dust before the elf archers, defeated by a rank bonus and the enemies numerous nature.
The undead impacted into the Empire centre, and after two turn of bitter fighting had managed to push them back over the central hill and make inroads towards their rear. However on the way through they had lost both their cavalry (destroyed by the White Wolves), and their skaven and goblin flank protectors; the goblins, sensing blood, had gone after the remains of the elves, while the skaven plague monks were tied up trying to deal with the rampaging white wolves.

"Chaos reigns as the Undead reach the Empire lines"
End Days:
At this point, with VP’s and the whole game having been very even so far, it all fell apart for the Evil alliance. The good news in turns 5 and 6 was that the remains of the elves on the left were being gradually ground away towards extinction by the skaven, Grom and the Goblins. The bad news was there was a disaster about to happen in the centre to the undead, and on the right to the Chaos.
The undead wedge that had driven into the centre of the empire lines had been hit in its unprotected flank by empire reserves lead by the (so far mainly anonymous) Emperor Karl Franz on his griffon. Already stuck in combat with the near invincible pikemen, the undead were overcommitted on the ‘needing to raise reserves’ front, and began to swiftly fade away.
To their the right the plague monks had finally managed to drive off the knights of the white wolf, only to discover themselves alone due to a general Chaos withdrawal in the direction of ye olde city of Manchester (the, now banished, Daemon Prince had muttered something about prior commitments in the daemonic haunting department during the build-up, but the rest of the forces of evil had hoped to have moved onto the celebratory squig beer and blood banks before such an eventuality arose).
As the Goblins continued to work their way through the (astonishingly inept) sword masters of hoeth and spearmen on the evil left, the undead finally collapsed (literally) in the centre, with the evil general meeting the Emperor in single combat (“its just you, me, my hammer of sigmar………oh, and my 40 guards!”). The vampire fell to the hammer just before the combat resolution finished him off.

"Brian Von Carstein loses out to the Emperor and his bigger weapon"
The final part was played out by a 475pt Chaos Warrior unit which was been in the Goblin reserve all game, and now charged into the Emperor looking for death and glory. They discovered the Emperor still had many, many friends, and that their own weapons were made of foam just before they got the death part of their wish.

"The last act"
On this suitable note the battle ended on turn 6 just before the time limit of 6pm, with few evil troops (or elves!) left on the battlefield, and Good winning by 58 VP‘s to evils 27.
Aftermath:
Up to turn 4 the victory points were tied, and it suddenly went all wrong for the baddies! The elves had collapsed in a truly spectacular way in the first few turns, and only became more resilient once they were reduced to approximately 20 models. The Empire, however, stood its ground and magnificently dealt with everything that came its was, including the 2,500pts of Chaos Warrior army, and the nearly 2,500pts of Undead and skaven that tried to chew its way through the centre.
In hindsight my own problems came when my undead attack became disjoined due to charging the pikemen early with zombies and grave guard, and, more importantly, losing my right-sided skaven and chaos flank support which gave the much-vaunted empire ‘second line’ its opportunity to hit all of my shuffling units in the flank.
In game terms it was an excellent day and it was very enjoyable playing Warhammer on such a large battlefield. The fog of war rules at the start provided some surprises, and shortened the setting up time, while the 30 minutes rule kept the momentum going and we fitted in 6 turns between 11am and 6pm.
Subscribe to:
Posts (Atom)