Thursday, 25 October 2012

Ancients Battle Report - Romans Vs. Romano-Brits

In the absence of the Greeks (off buffing their shields probably) my Romans turned upon their erstwhile allies the Romano-Brits (or Brits for short).  Their commander; Aidan, or King Arthur as he is now styling himself, devised a decent scenario where the Brits, having raided and pillaged to  their hearts content were now heading home, with the only thing between them and success in this venture being a river (with at least 2 crossing points) and a small contingent of roman cavalry and slingers.  The bulk of the Romans – mostly legionary cohorts – were due to start arriving from turn 2 somewhere off to the Brits flanks having chased them for a bit.  The implications were clear; if the legionaries caught up and a straight fight ensued then it would probably go badly for the Brits, so they needed to force the crossing and get away swiftly!  Being Hail Caesar a blow by blow account isn’t easy, so the summery will have to do.

Battle 1:
The Brit infantry, boosted in numbers by some defecting Roman auxiliary, took the direct route towards the crossings and the cavalry waiting there.  Their own heavier cavalry covered their more exposed right flank, or at least it did until a particularly spectacular blunder saw the order of “charge that cavalry by the river!” replaced by “retreat!”, 2 moves backwards!  This stalled the Brits attack, and a unit of Roman cavalry tried to take advantage by charging into the front of the rebel auxiliary, supported by the slingers.  This was only partly successful, with the arrival of the rest of the Brits infantry driving off the horsemen, but the 2 rebel auxiliary cohorts played no further meaningful part in the battle apart from fleeing under missile fire later.


Main British infantry division.
The Brits horse had no chance to rejoin the attack as the Roman legionary cohorts began arriving on the flanks, and they turned and charged home into a (foolishly) unsupported cohort at the head of the attack.  The legionaries fled and were cut down, leaving another two cohorts to pick up the responsibility of trying to give the Brits heavy horse a bloody nose.  This they succeeded in doing, grinding one unit down until it vanished and pushing back and pursuing the other.

The Brits become boxed in by legionaries to the left, and auxiliary horse by the river.
In the centre the 1st cohort of legionaries (large in size) faced off against the largest British unit as the British became boxed in by Roman troops.  Both had supporting troops, and in the end the Romans training and heavy status told, with the Brits trying to retreat and being destroyed due to the skirmishing slingers that had worked their way around behind them.  A brief hurrah for the Brits followed as their remaining heavy cavalry unit bashed into the flank of the 1st Cohort, adding to its damaged already received and sending it packing.  The combined efforts of the Roman auxillary horse and a cohort of legionaries was enough to see off this rally, and the last two Brit infantry units surrendered in an untenable position.

The Brits cavalry is finally defeated and the remaining infantry can't see a way out and surrenders.

Battle 2:
With an hour and a half left we decided to go again, with a scenario quickly thought up by me – a Roman Legionary column being attacked from the flanks by the Brits, with the auxiliary troops (horse and foot) arriving later on to try and save the day.  This was very much a one sided affair; the British cavalry striking hard and fast into the centre of the line of Roman infantry, destroying 2 of the 5 cohorts immediately, before turning outwards and charging into the rest.  The rear of the column had managed to form line before the impact, but the 1st Cohort at the front failed too and was harried from the battlefield, unable to change formation or turn to fight.  The auxiliary arrived just too late to save the day, with all of the legionary cohorts wiped out, and put in a counter attack across the river, only for lady luck to abandon them and they were driven back, abandoning the effort.  


The Roman column.

The column hit from the left by British horse, and with Brits infantry coming in from the right.

Analysis:  
When the numbers are even the Roman heavy infantry have the edge over the Brits medium infantry, however, good use of scenarios can prevent this from happening and make for a much more interesting game.  The first game was a good example of this, with Aidan foiled by his dice rather than the auxiliary, and a frantic bit of fighting ensuing when the Roman legionaries arrived to box in the enemy.  In other thoughts the Brits cavalry are more powerful than the Roman – heavy to my own preference to making my auxiliary horse only medium – which gave them an edge to going one on one with the legionaries, while mine lacked that extra bit of power to hit from the front.  Finally it was an all-painted army game!

Monday, 22 October 2012

Work In Progress - 2011-12 Review

I've just remembered that my tally for painted vs. purchased models was started on the 1st of October 2011, and as such I have passed the annual point without a final update!  That could be because very little has happened since I finished the Romans back in May 2012.

The final total stands at:
Painted - 246
Purchased - 152

So overall a very good result.  The purchased numbers were boosted by an extra 46 due to some Wars of the Roses purchases at Tripples, with the Romans fulfilling the rest of the sequence, and a box of Royalist horse in there too.  In terms of painted models again its 170 Romans in there - a whole army - along with two English Civil War regiments and some artillery and an officer.  I also found time to painted up a 15mm farm, some hills and some more tree bases, as well as fixing a number of trees to expand my scenery collection.  I also purchased a new carry case and enough foam to carry and store my Romans, Royalists and Flames Of War collection in from Figures In Comfort.

The first two thirds of the year were very good from a modeling and painting point of view, partly due to the amount of free time I had available.  I found a real enthusiasm to complete my Romans, and the Winter Of Discontent ECW campaign at the RGMB helped with the Royalists.  The last third from June onwards was more of a disaster because my work/life balance took a massive hit from a new job that didn't work out due to the length of the commute.

For the Future: Key factors are influencing the wargaming outlook fro 2012-13, mainly the financial restrictions which mean my purchasing power is weaker than the Liverpool forward line.  This means whatever I'm doing has to be unbelievably cheap, funded by sales, and preferably using models already in my collection.  With this in mind the immediate drive is towards the Wars of the Roses,which I've found to be of interest and I'm currently trying to make my box of 40 Perry miniatures men-at-arms and archers.  After that my Royalists need attention and flags!

So, starting again from 1/10/12 for 2012-13:
Painted: 0
Purchased: 0

Sunday, 21 October 2012

Average Joes - The Rats Rise Again - Part 5

Build up to the Quarter Finals:

Although no final group stage table has been forthcoming we do know the line-up for the knockout stages of the the Deeside Defenders 2012 Bloodbowl tournament.  At this point the competition divides into two parts, with the lower teams fighting it out for the Little Cup, and the main Bloodbowl 2012 Cup being contested by the top 8 teams.  Average Joes success means they enter the main cup, and will face a familiar opponent in the form of Dave Winter's Norse team Lakhti Longships.

The teams meet in the first round of the season, with 'Joes running out 3-0 winners, in a scoreline that flattered them, and a game characterised by poor Norse luck.  With 3 games played since then (although only 2 by 'Joes) they will be an altogether tougher proposition this time around, and that is without taking into account Average Joes notoriously poor luck in the knockout stages of competitions!

Teams News:

One of 'Joes key players; gutter runner Pepper Brooks, misses the game with broken ribs after an unfortunately fall into the crowd in their last outing against the Ungrateful Dead.  It may be replaced by a linerat before the kickoff to ensure the number of players remains at lucky 13.  Benedict, the newly acquired rat ogre, is fit to play, as is star rat; The Rat, who currently has 18 start player points and 5 touch downs to its name.

The Full Draw:

Bloodbowl 2012 Cup:
Paddy's Norse v Dave Mc Clumpha's Undead - early result 2-1 victory to the Norse
Little Si's Chaos v Ian Hendrie's Human
William Baldwin's Orcs v Grant's Dark Elves
Dave Winter's Norse v Rick's Skaven

The Little Cup
Ian Shaw's Skaven v  James ?
Dafydd's Humans v David Astbury High Elves
Paddy's halflings v Peter D's Undead.

Saturday, 20 October 2012

Wars Of The Roses - Part 1


I had that most exciting of things yesterday; a wargaming revelation – I played a new(ish) historical period and heartily enjoyed every moment!  So much so that I felt the driving need to instantly buy/build/paint a new army immediately, a sensation that has been missing for a while due to a lack of wargaming action and also because I have struggled to get enthusiastic about any one game/period to expend precious income upon it.

The period in question, like the title of the piece, is the War Of The Roses (WOTR for short), something I knew very little about but had been briefly introduced too by yesterdays opponent; Aidan, previously.  He happens to own enough figures (made and painted) to provide a decent sized army for both Lancastrians and Yorkists, which are very evenly matched, and I headed over by bus (!) for a game or two.

The Battle:
I won’t give a blow by blow account, just some small details and general happenings.  We used the Hail Caesar rules set in a scenario which saw my Yorkists attacking Aidans Lancastrians with the aim of capturing King Henry VI while he was sitting under a tree singing a song about hedgehogs (having clearly gone mad again).  Aidan had deployed first in an all round defense, while I massed my harder hitting infantry – the men at arms and billmen – on my right facing the hill and under the command of Edward IV, with my bowmen taking the centre under Warrick, and the heavy cavalry on the left commanded by an idiot.

Initial deployment from the Yorkist side of the table.

This helped me steal the initiative; piling up the hill and into Aidans left flank which had arrived there first but found themselves at a disadvantage with their archers at the front taking on my men-at-arms.  Some fierce fighting later and the Lancastrians left flank had been shattered and Edwards troops held the hill and were pushing beyond.  An attempt by the Lancastrian pike in the centre to retake the hill failed somewhat embarrassingly for their CO, while the commander of the centre of the Lancastrian line had the blood rush to his head as he lead a unit of archers in a headlong charge through the Yorkist centre (in a blunder most impressive!).  They wiped out a unit of Yorkist archers before running into my heavy cavalry, who were unsuccessfully trying to reposition themselves to support my right flank – as I  said; commanded by an idiot.  The heavy cavalry just about survived. 

Edward IV and his infantry capturing the hill.
 Edward IV pushed on with his troops to drive in the Lancastrian centre and come very close to Henry, before being severely inconvenienced by an axe – yes, I managed to get King Edward IV killed.  Nevertheless the battle was at a stage where the Yorkists were stopping for a breather, but the Lancastrians were badly battered, and we ended it declaring a Yorkist victory.

The Lancastrian centre.

The clash of the men-at-wars on my right.
Numerous historical characters had died, I think Somerset may have bitten the dust around the same time as Edward, and overall it was an enjoyable game, as well as educational because we started to iron out some of the bits of Hail Caesar we had been unsure about before, particularly the proximity rule.  My gung-ho approach to charging over the hill paid off, and if my cavalry had pulled their finger out it should have looked much more of a certainty.

The Future:

My current WOTR collection.  The pumpkin isn't relevant.
 Onto the future, and I now have a pressing need to collect a WOTR army – the wonders of an enjoyable game!  A few other things fuel this, not least of all having an opponent with a decent sized set of armies already so I can build gradually without having to create the whole thing from scratch.  Also I already own the rules set; Hail Caesar, so that takes a chunk out of the cost of collecting a new period.  The models in general enthuse me, there are a significant number of manufacturers making WOTR figures to a good standard, and the Perrys in particular are making plastics of infantry and cavalry.  Finally I already have a few figures, given that I own a box of the Perrys WOTR infantry plastics and Aidan has donated some unwanted men-at-arms – you would almost think he wants an opponent!  I’ve already dug them out of the garage, and maybe, just maybe, I might make some soon.  I also feel more of an identity with the Yorkists so they may be my faction of choice.  I wonder if I can get away with my castle and siege towers in this period?

Wednesday, 17 October 2012

Hail Caesar - Romans & Brits Vs. Greek


I made a first appearance at the RGMB on a Tuesday night since a Lord Of The Rings game on June 19th with an ancients game of Hail Caesar  booked.  It was really good to see a lot of people who I haven’t really since I started working in Manchester, and always good to see people actually pleased to see me.  In my absence the number of card players seems to have grown, and I still have genuinely no idea what is so entertaining about the whole thing – then again they probably wondered what the hell the interest is in the whole Romans Vs. Greeks model combat!  A game of Dystopian wars was on, while two battles of 40k and some warmachine rounded off the tabletop games.  Anyway, onto the battle.

The Setup:
The Romano-Brits (from now to be referred to as the Brits) turned up first and set up a battlefield with a fair amount of trees and rivers, the Romans arrived second after the hard work had been done.   Overlord Chris Fazey was floating around and accepted a position in the roman army and in the absence of the Greeks we started to set up for a quick game.  Deployment had been achieved when the Greeks arrived, and reshuffling commenced while the Greeks spent 30mins setting up.  The Overlord refused to go Greek on the basis that they all had a cold and he didn’t want to catch anything, plus there were some allegations regarding steriotypes, although overall he may just have not wanted to move chairs.  I took command of the Greek right flank, leaving the Overlord in command of a cut-down Roman army allied to the Brits.  Some wrangling about the size of the Greek frontages and the scenario commenced, and was concluded with the agreement that “the first to die loses”.  And we were off.  Slowly.

The Battle:
The Roman strength was massed on their far right, and failed to get into the battle to any effect apart from encouraging the Greeks to aim more towards the Brits with the objective of crippling them before the Romans could arrive on their flank.  The Brits sent one large division of infantry down the centre, following the combined Roman and British cavalry, and a smaller one on the far left.  The Greeks blocked their hoplites facing the Brits, with a weaker force on their left looking across at the Romans.

The main fighting occurred between the Greek central division against the larger Brit infantry division over possession of the hill between the tree groupings.  The Brits having first sent their cavalry in a hopeless attempt to charge through the front of the Hoplites, then made it to the top of the hill first, only for the Hoplites to start making their way up the other side.  The clash at the top saw the Brits defeated despite their numerical superiority due to the Hoplites skill at arms.  In the other clash in the centre the Roman cavalry followed the Brit example of charging the front of the Hoplites, with the same result!  The bulk of the Roman forces floundered across the river, with only a small, successful, clash against the greek light horse to show for their troubles (proving that men with sock; the slingers, could fight better than the rest of the army).  At the point where they had crossed the river the biggest Roman infantry division distinctly heard the order to head off to the right (off the table!) and went in search of the pub.  With the sideshow on the Brits left seesawing between the Hoplites and Brit infantry there and nothing but disaster looming in any more frontal attacks on the Greek forces the Brit CO – King Arthur, still grumbling about Hoplite unit widths – called it a day and the Overlord concurred.

Analysis:
So what did we learn.  Firstly that Hoplites are very difficult to defeat from the front, something which I had learnt last time out, but being on the Greek side it didn’t seem a good idea to share.  Cavalry to the front was a major mistake, sacrificing the units for nothing.  Secondly that we are rusty, and some more practice is needed!  There wasn’t a huge amount of rulebook consultation but there was a fair bit, and we were generally slower in making decisions.  Thirdly that Red’s Hoplites need their unit frontage widening from their 4 by 4 to an 8 by ¾, otherwise there is the high potential for them to gain an advantage.

In other notes I didn’t manage to notice whether my Romans looked more impressive with their newly repainted red shields.  I also think the battlefield had a bit too much scenery, and give the size of the forces could have been a bit bigger.  Finally a scenario is a preference to the stand and fight game, obviously requiring a bit more pre-planning.  Given I’m now jobless again I might get time for some of that.  Poor pictures I'm afraid, better luck next time.

The first turn or so, Greeks on the right in the white.

The cavalry on their ill-fated charge.

The Romans.

The main clash of the evening.

Friday, 12 October 2012

Declaring For The King - Part 4

The 10th of May was the last time my Royalists saw daylight and a battlefield, and you have to go back to the 11th of February for Part 3 of this thread on how I'm doing building them.  Warning: I'm fairly tired and what follows may be quite disjointed!

There has been a general lack of activity due to a lack of time, and a total lack of energy and enthusiasm for gaming as a whole.  Since my last non-Bloodbowl match (and there have only been 2 of those) back in June - also the last time I showed up at the RGMB - I been travelling and working and doing not alot else.  Having run myself into the ground I suddenly have some time off and some space in my head for gaming and my attention has been taken by my English Civil War troops once more.  This may also be prompted by the memory of the ECW campaign at the club which is now a whole year ago!

I haven't managed to buy the Pike & Shotte rulebook from Warlord games yet, although Amazons offer of £19.50 is tempting, due to lack of funds (paid job - petrol = 0 on the gaming funds front).  I had thought my army was finished in terms of models, although it has dropped behind most of the RGMB's clubs players in size now (Aidan, Red and Michael's armies all now outnumber my troops, and Luke's may also have reached that point if they could work out which way the exit from his loft is).  However, following the last couple of games I wasn't so impressed with the vision painted.  While my pike blocks looked the part, the musketeer 'sleeves' looked quite small (8 men/models), especially when compared to Michael's swedes (12 men) and Red's troops larger (10 man), so I've decided to expand them to this size, a task which is going to cost money (damn) and time (double damn).  For this I will have to go back to renegade I think, otherwise the figures won't match the pike blocks, although this would cost me £24 while warlord plastics would cost me less (£20) for pikemen included.  Hmm.  Do prefer the renegade models between the two.  Hmm.

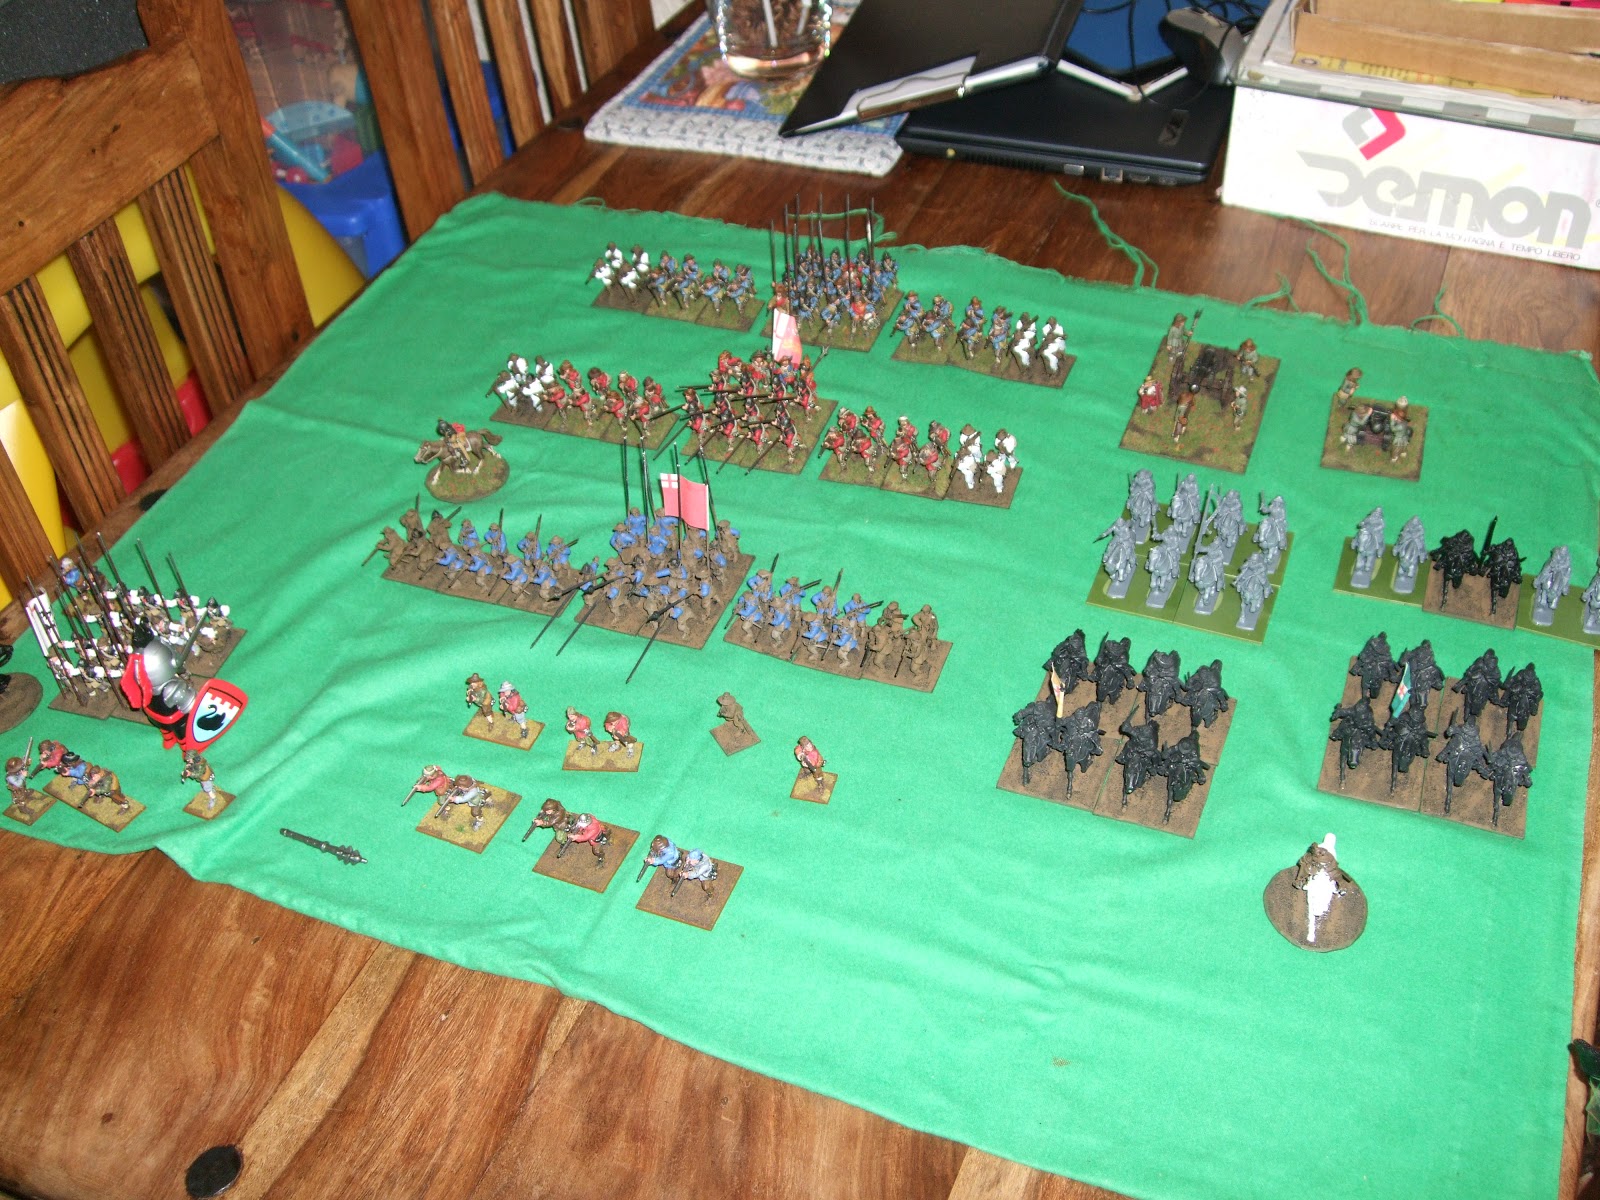
Anyway, I may eventually get to paint some bits of the massed unpainted horde - Aidan and Michaels armies putting me to shame, and even Red's is catching up.  A couple of pictures are below, bottom one with the shotte sleeves expanded to 12 men rather than 8, and Ben's knights launching a sneak attack on my pikemen with the assistance of my own forlorn hope.


Edit: Forgot I actually played a couple of games against Aidan last month, one Boltaction and one FOW, but don't remember much of either except it went badly for my Germans (the commuting is taking its toll on my focus and memory!).

Friday, 21 September 2012

Average Joes - The Rats Rise Again - Part 4


Match Day 4 – Average Joes Vs. the Ungrateful Dead


Match day 4 dawned dull and wet, went on to be mediocre, and after the sun set turned rather dark.  In the dark bit at the end racy skaven side Average Joes played out their final group match against a Necromatic Undead team; the Ungrateful Dead, coached by Dave Mc.  With a substantial sum in the bank Lord Flasheart (Derek to his special friends) brought a big reserve in to replace the thrower killed in a freak on the ball incident during match day 3.   His choice was controversial; a rat ogre named Benedict, and an apothecary rat was soon to follow – his medical qualifications being an ability to ring bells very loudly and hit players with a stick; Lord Flasheart actually considers him over qualified.  Even with this re-enforcement the loss of gutter runner Pepper Brooks to injury meant ‘Joes started with only 12 players against a team fielding 14, including an unhealthy spattering of wights (2 of), werewolves (2 of) and a flesh golumn.  The bulk of the undead team was made up of ghouls and zombies.  For the first time the ratty fans were outnumbered, with 10,000 furry bodies packing the part of the stadium not taken up by 15,000 dead wotsits.

First Half
The undead won the toss, and elected to receive in the opening gambit of an eventful game.  Unfortunately the ghouls hadn’t practiced picking the ball up beforehand (a reoccurring theme), nor the art of defending the carrier once he (it?) had managed the task.  This meant that turn 2 was barely over when linerat Duck flattened the ball-carrying ghoul, who spilled the ball in gutter runner Cotton McKnights direction, and a decent throw later sent the other skaven gutter runner; The Rat, scampering away for 1-0.  The Rat was to have a field day.
Most of the first half would be over before more end-zone action appeared, and once again it was The Rat, profiting after storm vermin Tank had knocked out a zombie and the ball fell loose again.  With the score at 2-0 there was time for linerat Justin to suffer a fractured skull (courtesy of a werewolf), and Tank to intercept a hopeful Undead attempt at a long pass in the skaven half.

Second Half
The second half started in a similar way to the first; with a gutter runner scoring in turn 2.  This time Average Joes received, and, after thrower Murdoch made a bit of a hash first time round at handing the ball over, a linerat flattened a threatening werewolf (they sure move fast!) and opened space for a superb touchdown - Murdoch handing it off to The Rat, who ran a third of the length of the pitch before finding Cotton McKnight with a precise pass.  Another third of the pitch later and it was 3-0.  At this point it all kicked off over “who had said what to our Sharon” in the Undead fanzone, and before the referee could remember the latin translation of “oooh, that’s not good” a riot was in progress.  Sadly neither team suffered any injuries, and when order was restored a good while later the nearest zombie to linerat Dodge remedied that fact with a serious injury in turn 5.  This didn’t stop the ratty scoring machine however, with storm vermin La Fleur throwing the block that dispossessed the ghoul with the ball, and Cotton made a long pass to set The Rat away for his hat-trick and Average Joes fourth.

There was just time at the end for a serious injury to Cotton’s tail (shouldn’t keep him out of the next match however), caused by a werewolf finally breach some shaky skaven defending to make it 4-1 the final score.  Linerat Duck managed to claim the fans Most Valuable Player award for not getting squashed by the flesh gollumn, while the rat ogre managed to do virtually nothing all match apart from shove at the golumn while it shoved back and neither went far.

Post Game Analysis
This victory leaves Average Joes in the top segment of the league at the end of the group stage, and unbeaten on a Bloodbowl pitch this season.  The last gasp SP points gained by the Ungrateful Dead also saw them hold onto their position in the top half despite their heavy defeat, with the only other skaven team in the competition the losers, dropping to the second tier.  Finally many thanks to Coach Dave Mc for his really positive attitude, effort and sportsmanship, even when the gutter runners were making the scoreline look particularly bad!  Hopes are high that the final table for Match Day 4 will be released this weekend.